Look what the Dork (Doggy Stork) brought….

It’s a Girl!

And she blogs!

Meet Zara, the newest addition to my family 🙂

Woof goes the Beagle

It was a long ride to my new home … but I finally got there.

First thing I did was to check out the facilities.

Darn!

They had to put the plants up where I couldn’t reach them, didn’t they.

042

I’m sure I’ll figure something out eventually.

I must say that car rides can be so tiring. So it was good that Ave had my crate all set up and ready. But there was a bear living in it and we hadn’t even been introduced. So I slept outside.

051

I also got to choose from a range of cuddlies.

The rabbit seemed the most chewable with those lovely long ears. Though I would have preferred her slow braised with a side of carrots.

056

I think I spoke out too loud!

Because the next thing I got was… you guessed it…

IMG00893-20130311-1114b

View original post

Say Cheese! … Goan Pao Bread goes Cheddar

039It’s good to be back where it all began, here at ‘The Cook, The Baker and The Clay Boy Maker’.

I’m the laid back sort. I think I’ve said it before. Frankly, I tend to say it every now and then just in case someone out there hasn’t heard it yet and mistakes me for one of those hyperactive, eager-beaver sorts. But then, it’s what I received as part of my heritage, being a good Goan that is (read: person from the beautiful, sunny, beach-kissed land of swaying palm trees known as Goa or “amche Goi” as we like to refer to the motherland, or simply, “our Goa”). The only difference between me and the local ‘poder’ (pronounced po-dere) or baker from Goa is that I would most definitely swap the ubiquitous bottle of fiery Feni that they swig down without batting an eye or twitching a muscle, for dainty sips of a good Merlot or Reisling.

But then, I did pick up a bottle of Feni the last time I visited Goa, only because the bottle was ceramic and had that lovely old-fashioned look to it, and because it would make a nice addition to the pots and bottles sitting in my little balcony garden, probably with a nice money plant growing out of it. The only problem is I haven’t got down to drinking the Feni yet. Perhaps I shouldn’t talk about drinking, given that it’s Lent and the very least I can do is not talk about alcohol even though I did have a glass of wine recently. But then so did my priest at mass.  

So back to the good old pao which we Goans so love and cannot do without, that Goan Christians in particular have come to be named after it. So we’re referred to as ‘Macs’ by all and sundry, which comes from the Konkani “maka pao di re” or “give me bread”.

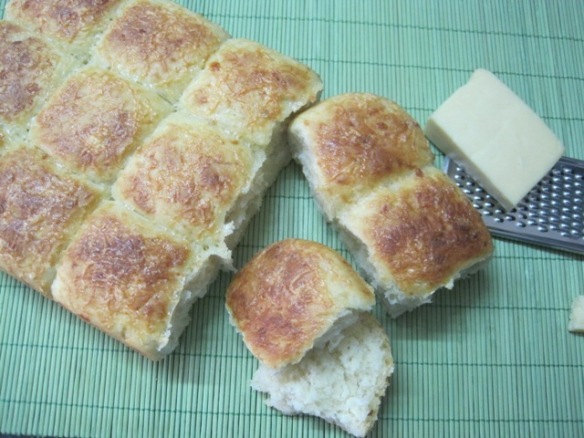
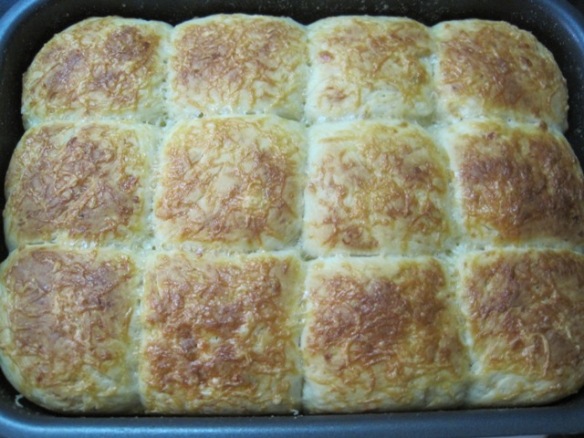
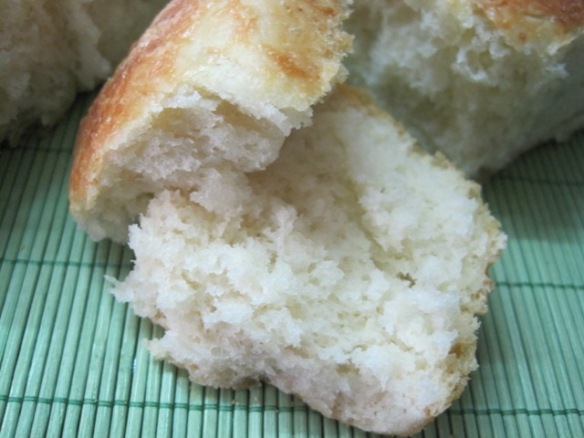
Pao is nothing more that a pillowy soft and fluffy, pull apart bread. In the old days when I was very young and Goa was on the family annual holiday list., toddy (sap which is tapped from palm trees) was used to ferment the dough and give it that lovely aroma and flavour which is missing from the pao you get in the market today. I haven’t used it in my recipe either but I decided to elevate the humble pao in my own way and used a lavish sprinkling of Sharp Cheddar both in the dough and on top of the bread just before baking.

Flavour??? Yup!!! There was loads of it.

017So here’s the list of ingredients –

3 cups AP Flour (+ extra for dusting etc)

2 tsps active dry yeast

1/2 cup tepid water (+ extra if required to form a smooth and elastic dough)

1/2 cup milk

1tsp sugar

1 tsp salt

1/4 cup Evoo (+ extra to line your bowl etc)

1 cup grated sharp Cheddar (+ extra for grating on top after brushing the loaves with milk)

2 tbsps full cream milk for brushing the loaves

Make sure you prove the yeast for 10 mins in the water along with the teaspoon of sugar. Add the frothy yeast mix to the flour to which you’ve added in the salt. Add in the milk and knead the dough well for at least 12 – 15 minutes. Leave it to prove in a dry place for at least 2 hours. Once the dough has more than doubled in size, remove it from the bowl and knead it lightly. Roll it out and sprinkle on the grated cheese, bringing the dough over in the folding motion. Sprinkle over the balance cheese, ensuring that the dough has been evenly dotted with cheese throughout. Shape into even sized balls and either place on a prepared baking tray or in a baking dish. about an inch to an inch and a half apart. Cover and leave the loaves of pao to prove again for at;least another hour to an hour and a half.

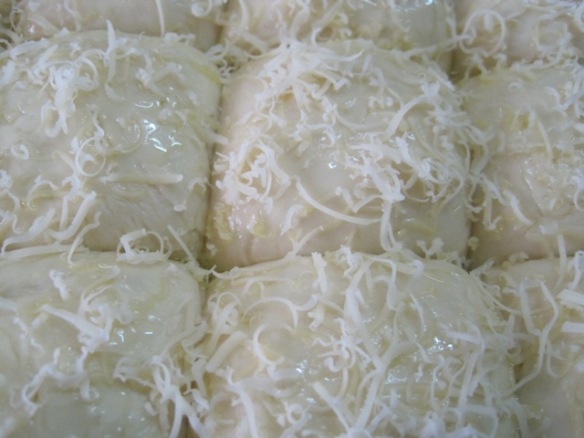
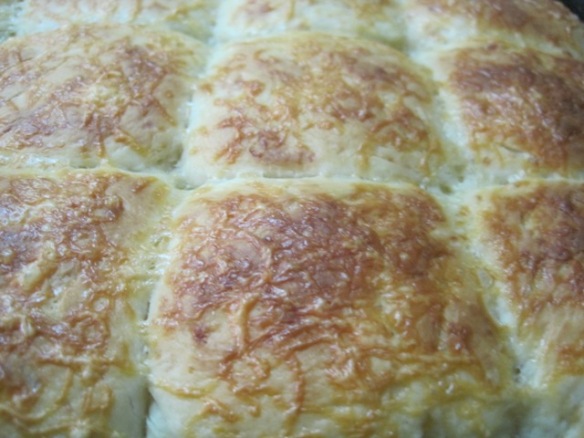
Preheat your oven for at least 20 – 30 minutes at 220º C. Once the dough has doubled or trebled in size, brush the tops with milk and grate on some more cheese, as liberally or sparingly as you like. You could also do an egg-wash instead on the milk, but then the cheese gives the top of the pao such a lovely golden hue when baked, that the egg-wash seems quite unnecessary.

Bake the loaves for about 30 minutes… allow them to cool in the pan for a couple of minutes…

020021… before turning the loaves out onto a cooling rack for an additional 5 to 7 minutes…

024… and go pao crazy.

Cut into it and slather on some butter. Or just tear it apart and dunk glorious fragrant, warm chunks of luscious cheddar pao bread into your favourite gravy or curry. Believe me, it does go with everything.

037Enjoy!

I’m Back!

After a very long hiatus and I’ve finally decided to revisit the place that started me of on my food blogging journey. I may not be as regular as I’d like to be but I’ll try and post as often as I can. Here’s a shout out to Rhonda Sittig from http://thethankfulheart.wordpress.com who wrote in to check if I was still blogging on my other website. Thanks for your thoughtfulness Rhonda. I’ll be dropping by your blog as soon as possible. Hope you are well?

And to my fellow bloggers and all those who’ve continued to follow me here. Here’s to you all…I’m happy to be back 🙂

Cranberry White Chocolate Chip Cookies

I know I’ve gone on record saying that I don’t quite care for chocolate chips. And it was true… up until I saw these little babies staring up at me one day and this recipe took shape.

Image

It’s simple, it’s scrumptious and the best part is that these cookies are perfectly bite sized.

Image

Here are the ingredients –

3/4 cup A. P. flour

1/4 cup butter (softened)

3 tablespoons granulated sugar

1 tablespoon demerara sugar

1/4 teaspoon vanilla extract

1/2 teaspoon baking powder

1/4 cup baby white chocolate chips

1/4 cup dried cranberries (chopped and steeped overnight in 2 tablespoons white rum)

1 small egg

pinch of salt

1/4 teaspoon mixed spice

Get a medium sized bowl and cream the butter and sugar. Add the beaten egg, vanilla, salt, mixed spice and combine by folding the ingredients together. Add in the chocolate chips and cranberries and fold in. Finally add the flour that has been sifted with the baking powder and fold to combine.

Image

Refrigerate the cookie dough for about 10 to 15 minutes while you preheat your oven to 180 degrees C and line your cookie trays with parchment.

I wanted small bite sized cookies ( I got 14 cookies from this recipe which I halved from my original recipe), so I used a tablespoon to measure out the dough-balls…

Image

Bake the cookies for about 15 to 18 minutes till the bottoms begin to brown and the tops of the cookies get a touch of colour…

Image

Transfer the cookies onto a wire rack and let them cool completely before digging in…

Image

And since they were so perfectly sized I didn’t feel guilty eating more than one 🙂

Image

Image

A B(r)unch of Leftovers… Cheesy Foccacia Bites and a Rotizza

I should have posted this a while ago but I was away travelling and access to the internet was quite iffy… but well, but late than…

So here they are, a 2-in-1 recipe bonanza on… Leftovers!

Yes, apparently leftovers can make really tasty meals. Or so someone once told me many years ago and I yawned and said boo hoo and bah humbug or something to that effect.

I’ve got to come clean though you’ve probably guessed it by now. I’m not big on leftovers. I simply worked on perfecting the small meal mantra till I got it down to a pat. Or I would pray that a friend would call and say they were coming over and then I’d tell them to stay to dinner, which could be construed as deviousness on my part except that the meals were generally good and went down well with my guests 🙂

But what do you do when it comes to something like bread which you’ve baked and couldn’t quite finish and it’s been a couple of days heading into being a week old and it’s still sitting in your fridge with a look that says “You made me and enjoyed me but now that I’m old and not quite finished you’re going to throw me away…” … (gulp!)

Now if you’ve been following this space you’ll know that I baked a Feta and Olive Herb Foccacia  recently, and it was really delicious. So I squirrelled away a bit and hid it away in the fridge thinking that I would eat it the next day and forgot all about it until 3 days had passed and I was foraging around looking for something to whip up real quick for brunch… and then I saw it and voilà my ‘Cheesy Foccacia Bites‘ look shape.

This was a super simple, easy to whip up dish which brought out all the flavour and goodness of the lovely foccacia I had baked earlier and took it up a notch into a realm all its own.

All you need is –

approx 2 cups of cubed leftover foccacia

bulb of one spring onion (minced)

green stalks of 2 small spring onions (minced)

2 small green chillies (de-seeded and chopped fine)

1 tomato (blanched, de-seeded and chopped fine)

6 button mushrooms (sliced fine)

1 tablespoon EVOO

1/4 cup shredded mozarella

squeeze of lime juice (optional)

Start by sautéing the chopped up spring onion bulb, green chillies and tomato in the olive oil till softened (3 – 4 mins). Add the sliced mushrooms and the spring onion greens (reserve some for garnishing) and cook them down till the mushrooms are soft. Add a pinch of salt at this point (you don’t need more than just an itsy-bitsy pinch). Now add the cubed foccacia and toss well.

Finish by adding the shredded mozarella. Cover and turn off the flame. The mozarella should melt into the bread. 

Serve the Cheesy Foccacia Bites hot, garnished with spring onion greens and a squeeze of lime juice (optional). 

P.s. This recipe also works well with any other left over bread (except for fruit or sweet bread varieties). Just add in some zataar, or if you don’t have any zataar some mixed dried herbs with a squeeze of lemon and some freshly pounded cumin should work quite well.

And now to the 2nd part of the double leftover brunch bonanza and the… ‘Rotizza’.

I sometimes find myself stuck with a few leftover rotis/chapatis (Indian flat bread) from an Indian meal made the previous day and try and use them in different ways to freshen them up and excite my palate. Now if you’ve been following this space for a while you’ll probably know that eggs are one of my all time favourite foods and I can eat them at breakfast, lunch (that includes brunch) and dinner… and yeah, as part of dessert as well. So it really didn’t take too much for me to come up with this Egg-Roti recipe… in fact I went to town with it and came up with a pizza of sorts and decided to name it just that… a Rotizza. My version of an Indian style pan fried pizza using leftover or even fresh roti/chapati.

For a single serving you’ll need –

2 rotis

3 eggs

6 – 7″ piece of leek (sliced fine)

1 cup of thinly sliced zucchini

1 large bell pepper (thinly sliced)

salt (to taste)

1/2 teaspoon black pepper

2 tablespoons olive oil (1 tablespoon per roti)

2 tomatoes (for grilling)

Sauté half the leek in a tablespoon of olive oil, spreading it out evenly across the pan as it cooks down and softens. Layer half the zucchini over the cooked leeks and top with half the thinly sliced rounds of bell pepper. I only had the green variety (aka capsicum) on hand but a combination of green, yellow and red works even better visually. Sprinkle over a little salt and allow the veggies to cook down a bit.

Meanwhile whisk the eggs, adding a pinch of salt and 1/2 teaspoon of black pepper. You could add a splash of cream if you like into the egg mix (I didn’t) and pour half the egg over the veggies. Let the eggs cook for about 2 minutes on low. Do not cover the eggs… so the top remains a bit runny. Place the roti over the egg and gently press it down with a spatula. Cook for about a minute, then flip the rotizza over and fry it on the other side (roti side down) for a minute.

Remove the rotizza from the pan and repeat the procedure for the second roti. Plate up and serve garnished with grilled tomatoes and bell peppers.

Saturday Night Treats (Part 3 of 3)… Potato Salad

I’m down to the last part of my Saturday night dinner, a delicious Potato Salad to accompany my Skewered Prawns with Zataar, Cumin and Red Chilli and a Feta and Olive Herb Focaccia. And even though this is a rather simple Potato Salad, it took the most time in terms of preparation from the three dishes on the menu, because I made everything from scratch, apart from growing my own veggies.

Speaking of growing your own lovely fresh veggies you must pop over to Val’s blog over at 100 Square metres. Now Val grows his own veggies and quite an array of them too, the unfortunate part for me is that he lives across the seas in a completely different country and so I don’t have direct access to any of those delicious vegetables except through the pages of his blog.So do visit his blog and feast your eyes… the black and white photos he took recently are just amazing.

For my Potato Salad, I started out by making a Mustard, Pepper Mayonnaise, using 2 egg yolks, lime juice, white wine vinegar, salt, sugar, extra virgin olive oil, Dijon mustard, freshly milled black pepper and water.

For the dressing

1/4 to 1/3 cup of my home-made Mustard, Pepper Mayonnaise (I forgot to measure…sorry!)

1/2 cup hung yoghurt

1 tablespoon honey

a large pinch of salt

a level teaspoon of dried parsley

Blitz all the above ingredients in the food processor till well incorporated and refrigerate until you’re ready to serve the salad.

For the potato salad… which serves 2, you’ll need –

3 medium potatoes (boiled, peeled and cubed)

2 spring onions (bulbs and tops of the stalks only)

1 stalk celery (chopped)

1 small cucumber (de-seeded, sliced and chopped)

a handful of roasted walnuts (chopped)

1/2 teaspoon paprika

about a 1/4 cup of the dressing

Add the potatoes, spring onions, celery, cucumber and paprika to the bowl. Cover and refrigerate until ready to serve.

Everything… but the walnuts and the dressing

Meanwhile roast, cool and chop the walnuts and keep them aside in a separate bowl (also refrigerated).

Just before serving, mix the walnuts in with the salad and spoon over at least a 1/4 cup (or more) of the dressing.

Saturday Night Treats (Part 2 of 3)… Feta and Olive Herb Focaccia

… to continue where I left off from my previous post (Skewered Prawns with Zataar, Cumin and Red Chilli) I’ll move on to part 2 of my dinner…

A Feta and Olive Herb Focaccia

The baker’s wage… a mini focaccia… all to myself.

I spread out the dough a bit thinner than I normally would (do take a look at my earlier post on Cheesy Herbed Focaccia with Sun-dried Tomatoes) and I spritzed the oven with water just to get that crusty finish to the top and sides of the bread.

Look at these plump olives… delicious!

Here’s a list of ingredients for the focaccia –

3 cups A.P. Flour

12gms fresh yeast

1 teaspoon sugar

1 cup + 2 tablespoons tepid water

1 teaspoon salt

1 tablespoon (+ extra for sprinkling over the focaccia b4 baking) dried parsley

1 tablespoon dried oregano

1/4 cup olive oil (+ extra for lining the bowl and brushing over the top of the focaccia)

3/4 cup chopped olives

3/4 cup feta (cubed)

pinch of sea salt (for sprinkling over the focaccia… not too much as the olives and feta are both salty… you can omit the salt too coz it’s not necessary in this recipe. But I love salt… and I have low blood pressure, so salt is often my best friend.)

Prepare the yeast the usual way (I used fresh yeast) … water, sugar and leave it for 15 minutes till it gets nice n foamy.

In a separate bowl sift the flour and add salt and the dried herbs. Mix it with the yeast, adding the 1/4 cup of olive oil and knead to form a soft dough. Leave the dough to prove for about 2 hours then knock back and knead again, dividing the dough into half. Using your hands shape the focaccia into the basic shape you like before transferring it onto a parchment lined baking tray. I made one oblong, one rectangular focaccia and a mini focaccia (I call it the baker’s wage :-)). Then using your fingertips punch and jab the dough to give it its dimpled look.

Generously sprinkle on the olives and dot the focaccia with feta, before leaving it to prove for another 1 1/2 hour, covered with a towel. Once the focaccia has risen, brush the top with olive oil, and sprinkle on some dried parsley and whole sea salt (optional).

Bake the bread in an oven pre-heated to 200°C for about 20 – 25 minutes…

Allow the focaccia to cool completely on a wire rack before slicing into it. I used a pizza cutter and we ate almost an entire focaccia right then and there… dipping it into some extra virgin olive oil mixed with a combination of zataar, parsley, oregano and whole salt. I should send this over to YeastSpotting

And served the rest with my platter of skewered prawns and potato salad…

Saturday Night Treats (Part 1 of 3) … Skewered Prawns with Zataar, Cumin and Red Chilli

Saturday Night and everything sucks on TV. And then I’ve kinda hung up my dancing shoes for a bit (which is a seasonal thing with me. And NO that doesn’t mean I’m in the winter of my youth… 😉 Besides I have a friend staying over who says that she dances like a horse, and I’m sure she wasn’t referring to the ones you see at show jumping events, so I really wouldn’t have been able to drag her along. But I’m not complaining. It is wonderful having friends over. It gives me another reason to cook and receive a compliment at the end of it, which I’m certainly not averse to.

Now I wanted to enjoy my evening in every way and didn’t want to end up stuck in the kitchen all evening, so I prepped everything in advance and kept it simple, which left me free to chatter away, play a couple of hands of UNO, sip on some extra spicy Bloody Marys and listen to some music… Perfect!

Here’s a sneak peak at the menu… 😉

1. Skewered Prawns with Zataar, Cumin and Red Chilli served with a delicious dip.

2. Feta and Olive Herb Focaccia 

3. Potato Salad with Spring Onions, Cucumber, Roasted Walnuts and Celery (with a home-made dressing… which I also used as a dip for the prawns).

But putting all of these into one post may just be too much, so I split ’em up into three starting with…

The Skewered Prawns with Zataar, Cumin and Red Chilli…

You’ll need about 20 prawns (medium to large sized with their tails on)

2 teaspoons zataar

1level teaspoon freshly pounded cumin powder

1/2 teaspoon red chilli powder

large pinch of salt

juice of 1/2 large lime

1 tablespoon honey

2 tablespoons evoo (extra virgin olive oil)

Start by cleaning the prawns, or if you have pre-cleaned prawns make sure that the vein (aka the poop-chute) has been removed. Now some of the larger sized prawns have 2 veins, at the front and at the back, so make sure you get both of them out completely.

Wash the prawns well and drain them thoroughly, then pat them dry before marinading them in the zataar, cumin, chilli powder, honey, lime juice and 1 tablespoon of the olive oil marinade. Don’t add the salt in just yet.

Keep your prawns marinading in the refrigerator for at least 2 hours (An hour should also be okay if you’re in a hurry, but I prefer to keep them marinading longer).

When you’re ready to cook the prawns, sprinkle on the salt and skewer the prawns onto wooden skewers that have been soaking in water (This will prevent the skewers from burning) and brush with some of the marinade to which you have added the balance tablespoon of olive oil.

I used my trusty grill pan to grill the prawns

Then piled them onto a platter and served them with a dip/dressing I made from my own home-made mayonnaise and hung yoghurt.

I’ll let the pictures speak for themselves…

Basil and Seed Loaf and a BLT

In one of her letters to Vita Sackville-West, Virginia Woolf wrote:

“… does it strike you that one’s friendships are long conversations, perpetually broken off, but always about the same thing with the same person?”

The beauty of friendships is just that. That despite the ebb and flow of life taking it places, crashing it over rocks, battering it against embankments, and sucking it into whirlpools, there’s always that unseen thread, that one stray link that binds friends together, whether it’s a common interest or a pet peeve. And so we banter, we fill our lives with words, with conversation… but as Virginia said, it’s “about the same thing with the same person”.

Which makes me grateful for all my friends and acquaintances, people I’ve had the good fortune to have encountered, who’ve filled my life with their presence, for howsoever short or long a time it may be or have been. People I’ve known for much of my life, and those I’ve only just met or have only encountered in virtual space… I’m grateful for all, for everything… and for Virginia Woolf who made me fall in love with books and reading, and expanded my mind and heart in ways I never thought possible. And who made me realize that it’s okay to be a maverick, and a non-conformist and to cock a snoot at the world, and cook and bake and clay boy make, and paint cartons because I’m falling short of storage, and if I have to keep them around for a little while longer they may as well look pretty.

Speaking of all things nice, I just baked a loaf of bread, a seed loaf, a Basil and Seed Loaf that I’ll be sending across to Susan at YeastSpotting.

Packed full of goodness, this loaf is nutritious and makes fantastic sandwiches, which is great because summer brunch on most days ends up being a sandwich, open or closed, with or without a salad on the side. These sandwich loaves are wonderful sliced thin or thick, or even cut into croutons and toasted to be tossed into a salad or as a garnish for a cold or hot soup. I love the crust on this loaf and that happened because I placed a tray full of water on the lower shelf of the oven and sprayed the inside walls to create steam.

I used a variety of seeds in this loaf, sunflower, melon, black and white sesame and flax seeds, toasting them a bit, and then cooling them completely before adding them to the dough.

Here’s what you’ll need –

2 1/2 cups All Purpose Flour

12gms fresh yeast

3/4 cup warm water

1/2 teaspoon sugar

1 teaspoon salt

1/4 cup powdered milk

1/3 cup mixed toasted seeds  

2 tablespoon chopped fresh basil

3 tablespoon sun-dried tomato flavoured Extra Virgin Olive Oil (aka evoo + extra for lining the bowl, coating the bread pan and for brushing the loaf before baking)

All you have to do is activate the yeast with the sugar and water, before adding the flour, powdered milk, evoo and salt. Mix to form a rough dough. Now add the toasted seeds and chopped basil, making sure that it is well distributed throughout the dough. Knead for a good 10 – 12 minutes. Place the dough into an oiled bowl, cover with cling wrap and leave the dough to prove for 2 hours.

Post first prove

Turn the dough out onto a lightly floured surface and knead after the first proving, then shape and transfer the loaf into an oiled and cornmeal dusted bread pan. I rolled up the loaf, just for fun and left it to prove for 1 ½ hours.

Rolled up… Just like that!

Made a couple of slashes into the loaf when it had risen with a sharp knife, brushed the top with some evoo and placed the loaf into a pre-heated oven into which I had placed a tray on the lower shelf.

I wanted to create a lot of steam for this loaf in order for it to get a lovely crust, so I poured some water into the hot tray, sprayed the inner walls of the oven with water and shut the door. You’ll need to spray the walls of the oven a couple of times during the baking process, but be quick and don’t open the door too much. Bake the loaf for 35 minutes at 190°C.

I turned on the grill element for a bit right at the end (5 minutes or so) to brown the top of the loaf, keeping an eye out to ensure that it got evenly browned.

Allow the bread to cool in the pan for 10 minutes then turn it out onto a wire rack to cool completely before slicing into it.

All rolled up…

Look at that!

This loaf is great eaten with loads of butter…

But it also made an excellent Bacon, Lettuce and Tomato Sandwich… An open-faced BLT I dished up at brunch the next day with a Lettuce, Bocconcini and Cranberry Salad.

Now… If you’ve been following my blog you’ll know that I always say that everything tastes better with bacon and booze, not necessarily in that order and not necessarily together. This recipe uses just one of my favourites… Bacon, marinaded in Barbeque sauce, Dijon mustard and honey with a couple of twists of the pepper mill and then pan fried…

Bacon!

I then paired my BLT with a light and refreshing salad with a dressing that used some of the same marinade that I coated the bacon with.

I may as well give you all the ingredients at once just to make it a bit easier… have all the ingredients in place… mise-en-place. 

For the Sandwich you’ll need –

2 slices Bread (I used my Basil and Seed Loaf… sliced 1/2″ thick, and toasted with a drizzle of evoo)

3 – 4 rashers back bacon (marinaded and pan-fried or oven roasted)

2 medium tomatoes (blanched, quartered and deseeded – marinaded in 1 teaspoon balsamic vinegar + 1 tablespoon evoo with a pinch of black pepper)

2 large chillies – roasted, skinned, deseeded and drizzled with 2 teaspoons of the Salad Marinade

(I used a local variety of fat green chillies called Bhavnagri Chillies which had a fair amount of bite to them, perfect for my sandwich)

a small handful of Rocket leaves

1 – 2 large leaves of Iceberg lettuce (torn up)

For the Salad –

a large handful of Rocket leaves

a large handful of Iceberg lettuce (torn up)

3 – 4 pieces of Bocconcini

a handful of dried cranberries

large pinch of black pepper

1 teaspoon Orange zest

For the Bacon Marinade –

2 tablespoons Barbeque sauce

2 teaspoons Dijon mustard

1 tablespoon honey

(You’ll need less than half the marinade to coat the bacon. Reserve the rest for the salad dressing)

large pinch of freshly milled black pepper while frying the bacon

For the Salad Dressing –

the rest of the bacon marinade

juice of 1/2 lemon

juice of 1/2 orange

pinch of black pepper

1 tablespoon evoo

(Mix the dressing well and chill till required)

To construct the sandwich lets get started with pan frying the bacon, for which I brushed the pan with just a wee bit of oil, then lowered in the slices of marinaded bacon and cooked them on a medium to low flame till the fat melts and the bacon starts to get gorgeously caramelised. I love those little burnt looking bits on top… and I’ve got to admit that I started with 4 rashers and was left with 3 to make my sandwich. The one found its way into my stomach as soon as it was out of the pan and it was delicious 🙂

So once the bacon’s done, keep it aside and get started on the bread, slicing and then pan- toasting the slices with a drizzle of evoo. Let the bread cool down a bit before you start assembling.

First to go onto the gorgeous bread is the lettuce which I tossed in some of the salad marinade. Followed by a layer of tomato, then topped with a layer of green chillies and finally topped with the bacon…

Rocket and Iceberg Lettuce

Plum Tomatoes

Roasted Large Bhavnagri Chillies

Now that’s a BLT!

For the Lettuce, Bocconcini and Cranberry Salad – start by tearing up the lettuce into a bowl, toss in the cranberries and zest the orange. Then tear up the Bocconcini and add it to the salad, spoon over the chilled salad dressing. Toss and serve immediately.

Now drizzle some of that salad dressing (if there’s any left over over your BLT and enjoy…

Mini Quiche… Two for One

My love for quiche is a fairly recent one even though I’ve been eating them over the years. Some have been good, others decent, some sinking like lead and most of them way too eggy. The delicatessen counter at a well known 5 star hotel in Mumbai used to dish out a fairly decent spinach quiche, but a couple of bites and my stomach would feel like it had been through a 5 course meal. Can you imagine heading back to work after one of those and hoping you’d get through the afternoon and evening without …. zzzzzzzzzzzzzzzzzzz ….

And then one day I started baking my own pies and quiche… and seldom ate one that was deli or store bought after that.

I used a simple flaky pie crust recipe for these, tweaking it a bit, and adding in some spice, just for fun.

For the Spiced Flaky Pie Crust you’ll need –

1 1/4 cup AP flour

1/2 teaspoon salt

1/2 teaspoon powdered sugar

1/4 teaspoon paprika powder

1/4 teaspoon grated nutmeg

1/2 cup cold butter (cubed)

3 – 4 tablespoons ice cold water

Mix the dry ingredients. Add the butter and cut it into the flour. I used a cold fork (refrigerated) to break the butter down, and once that was done, I used chilled fingertips (mine, of course, rubbed with an ice cube till hey were short of numb ;-)) to mix the butter into the flour till it resembled coarse breadcrumbs. Now add the icy water, a tablespoon at a time, and working fast knead to form a dough. Cover the dough with cling wrap and refrigerate for at least 4 – 6 hours or overnight.

So now that you’ve got the dough all ready and sitting and chilling in the fridge you can get down to the business of the filling for your quiche.

I decided to make two different fillings, and follow two different methods. The first one had the filling put into the pastry with the custard poured on top, and the second quiche had the filling folded into the custard and spooned into the pastry lined tray.

Now I don’t recall if I’ve said this before, but I’m not really a big fan of full sized pies or quiche. They intimidate me, even though I’m quite aware that I can cut out just the portion I want. But anyway… what, or seriously where would I be without my little quirks, and mind you, I have quite a few of them. So I used my good old inch deep mini muffin trays to make these obviously mini quiche(s).

Quiche # 1 –

Duo of Mushroom with Babycorn*

Duo of Mushroom with Babycorn Mini Quiche

Ingredients –

4 – 5 ears of babycorn (depending on the size) – sliced

1/4 cup button mushrooms (sliced)

small handful of fresh baby oyster mushrooms

1 spring onion (sliced fine)

2 teaspoons vegetable oil

1 teaspoon butter

 pinch of salt

1/2 teaspoon black pepper (freshly milled)

4 medium cloves garlic

1 large green chilli (sliced down the centre, deseeded and sliced into semi circles)

Toss the spring onion with the garlic in hot oil, add the babycorn and sauté for a minute, before adding in the mushrooms, the butter, chillies and seasoning. Toss on high for a minute and turn off the heat. Keep aside to cool.

*(The filling is enough for at least 12 mini quiche, but I used just half the quantity as I was only making one 6 muffin tray full.)

For the custard you’ll need –

3 eggs

1/2 cup milk (I used low fat milk, but you can use full cream milk if you like)

2 tablespoons sour cream (omit this if you’re using full cream milk)

1/2 teaspoon black pepper powder (freshly milled)

1/4 teaspoon nutmeg

1/3 cut grated cheddar

1/3 cup Cheddar Cheese for topping (grated)

Whisk the eggs, add the salt, pepper and nutmeg, and keep beating. Slowly add the milk, and finally the grated Cheddar. Note that I haven’t used salt in the custard since the cheese will have enough salt, so you don’t really need more.

The custard is enough for at least 14 – 15 mini quiche… so served me well for both the quiche recipes.

Thaw the pie crust for 15 minutes or so before rolling it out to roughly a 2 – 3 mm thickness. Cut out circles using a utter or an inverted circular lid.

Grease the muffin trays with some olive oil or melted butter. Place the pie crust into the trays, evening them out (if required) with your fingertips. Using a fork make a pattern with the tines of the fork in the pastry.

And with a short jabbing motion make 3 rows of holes into the bottom of the pastry, spoon in the mushroom and babycorn mixture, and pour over the custard.

Top with extra grated Cheddar and bake the quiche in a pre-heated oven at 210° C for 20 – 25 minutes, or till the quiche have set.

Quiche # 2

Pan-roasted Eggplant and Zucchini

Creamy Pan-roasted Eggplant and Zucchini Mini Quiche

Ingredients –

4 large slices (1 cm thick) eggplant (pan-roasted and chopped)

1/2 small zucchini (sliced, pan-roasted and chopped)

1 – 2 tablespoons oil for drizzling over the eggplant and zucchini before roasting

! large jalapeño chilli (deseeded and sliced)

pinch of salt

1/4 teaspoon freshly milled black pepper

1 tablespoon grated Cheddar  (+ extra for topping)

Combine the above ingredients, and fold into the custard (you’ll need about a cup plus of the custard). Spoon the mixture into the prepared pastry lined muffin trays (I did not tine-design these), grate some Cheddar over the top of each quiche and bake them in your pre-heated oven as before.

A glass of wine would be just perfect now wouldn’t it?

Have a great day!